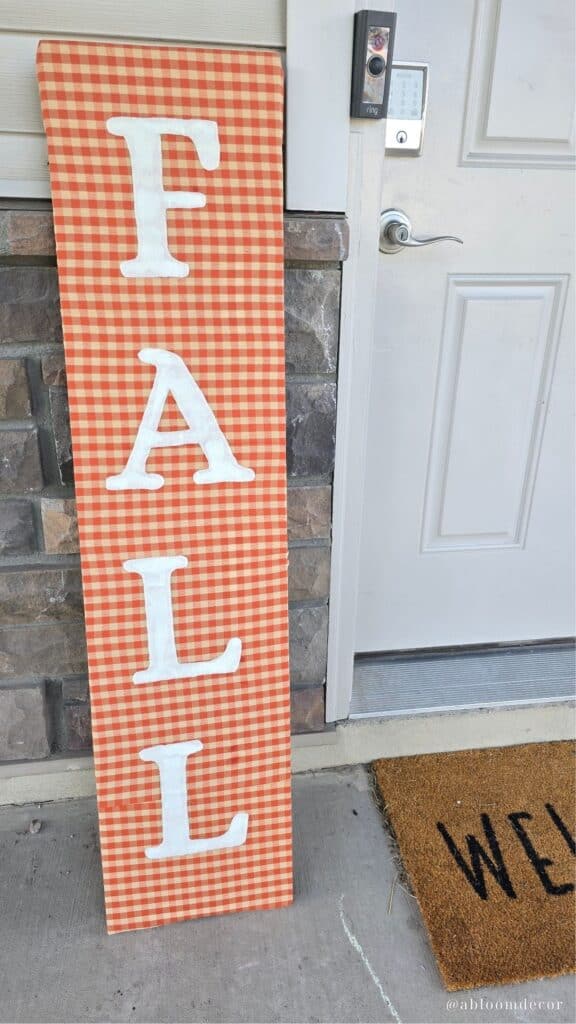
Easy Reusable DIY Fall Porch Sign You Can Update Each Season
This post is all about how I made this super cute front porch sign for fall!
One of my favorite things about decorating for the seasons is finding ways to make it simple and budget-friendly.
Have you ever wondered what your home decor style is?
Instead of buying a new porch sign every few months, I reuse the same wooden board and just swap out the fabric to match the season.
For fall, I went with this cozy orange gingham fabric and added big white “FALL” letters—it instantly gave my front porch that autumn feel I love. In this post, I’ll show you how easy it is to make your own sign that you can change up year-round.
You can save any of these images to your Pinterest account using the Pinterest share buttons on this page to easily find them again later.
DIY Fall Front Porch Sign
Let’s jump into how to make the porch sign. First we’ll gather materials, do a little prep work, and then go through the full tutorial.
Gather Materials

Gather the following materials to complete this project:
- Wooden Board (48″ x 11″x1″)
- Fall fabric (1 yard)
- Felt (at least two 8.5″ x 11″ pieces)
- Mod podge
- Foam paint brush
- Scissors
- Light-duty stapler
- Fall tracing letters (enter your email below)
Prep
To prepare for this DIY project, cut a piece of scrap wood to about 48″ x 11″. I happened to have a spare piece of wood in my garage that was the perfect fit!
Cut your fabric as-needed so that it will completely cover one side of the wooden board. I had one yard of fabric, so I cut my fabric in half and it overlapped towards the bottom of the board.
Print out the F A L L tracing letters. You can enter your email below and I’ll send you the pdf with the tracing letters I created, or you can create your own on your computer.
How To Make The Porch Sign

Here’s a step-by-step tutorial on how to make this wooden sign:
Step 1: Center the wood

The first step is to place your wooden board on top of your fabric. Be sure to leave about 5 inches of fabric on all sides.
step 2: Staple the fabric

Next, use your stapler to staple the fabric to the wooden board. Make sure to pull the fabric tightly enough that it does not sag, but not too tight so that it looks stretched.
I placed my staples about 3-5 inches apart and that worked really well.
When you get to the corners of the board, just wrap it like you would a Christmas present. It will give your sign a nice, clean look.
step 3: Flip the board

Once you’ve finished stapling the fabric, flip the board over and get ready for the next step!
step 4: Cut out the letters

Grab your F A L L tracing letters and cut them out! We’ll use these as stencils with the felt.
step 5: Trace the stencils

Trace the F A L L stencils onto the felt fabric. One tip I wish I realized when I did this step, is that if you flip the letters over and trace them backwards, then you won’t have to worry about the marker showing up when you cut the letters out.
step 6: Cut the felt

Cut out the felt letters. Try to cut smooth lines and curves.
step 7: Arrange the Letters

Once all the letters have been cut out, arrange them exactly how you want them to look when the sign is finished.
step 8: Apply glue

Flip each letter over and apply a layer of Mod Podge to the back of the letter using the foam paint brush. Don’t worry if a little bit of mod podge gets on the orange fabric, just wipe it off and let it dry (it dries clear).
step 9: Adhere letters

Once the glud is applied, flip each letter over and gently press them down. Try your best to keep them centered on the board, with even spacing between letters.
The plaid fabric made this easy for me because I could count how the rows and columns.
How to Style This Porch Sign
Once your porch sign is ready, the fun part is styling it! I like to prop mine right next to the front door so it’s the first thing guests see when they walk up.
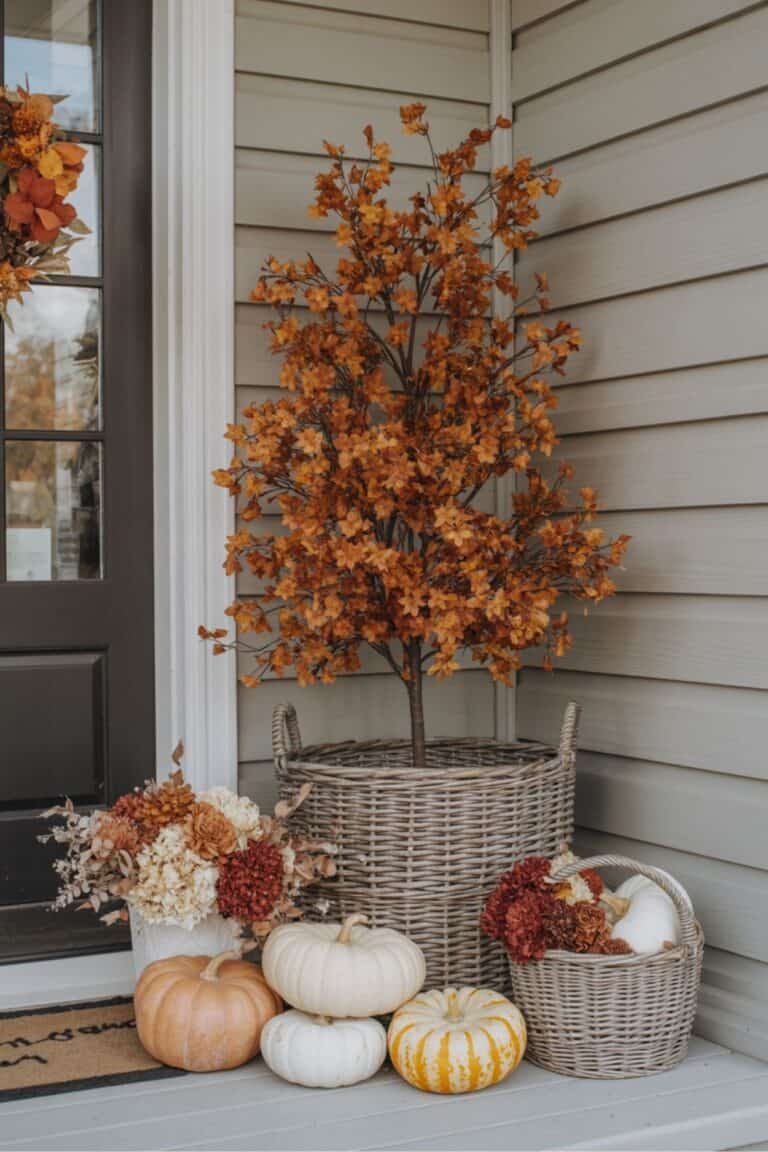
To make it extra cozy for fall, pair it with a layered fall doormat, a few pumpkins, and a lantern. If you have space, add a basket of mums or a plaid blanket draped over a porch bench.
The best part is that you can switch up the fabric and accessories each season, so your porch always looks fresh without needing a complete makeover.
Conclusion
I love that I can reuse this DIY porch sign repeatedly by simply switching out the fabric. It’s such a practical way to decorate without filling my storage with bulky seasonal signs.
For fall, the warm colors and bold lettering make my porch feel so inviting, and I know I’ll have just as much fun updating it for the next season.
If you’re looking for a quick, affordable, and flexible project, this porch sign is one you’ll enjoy bringing out every time the seasons change.
PIN IT TO REMEMBER IT
Don’t forget to pin this so you can refer back to it later!

Before buying furniture, get this free checklist!
The measurements, sizing rules, and 10 must-ask questions that save you from returns, regrets, and wasted money.